6.3. Web Meeting
6.3.1. Scheduling a Meeting
To start a video chat, click on the camera icon (right of the chat icon).
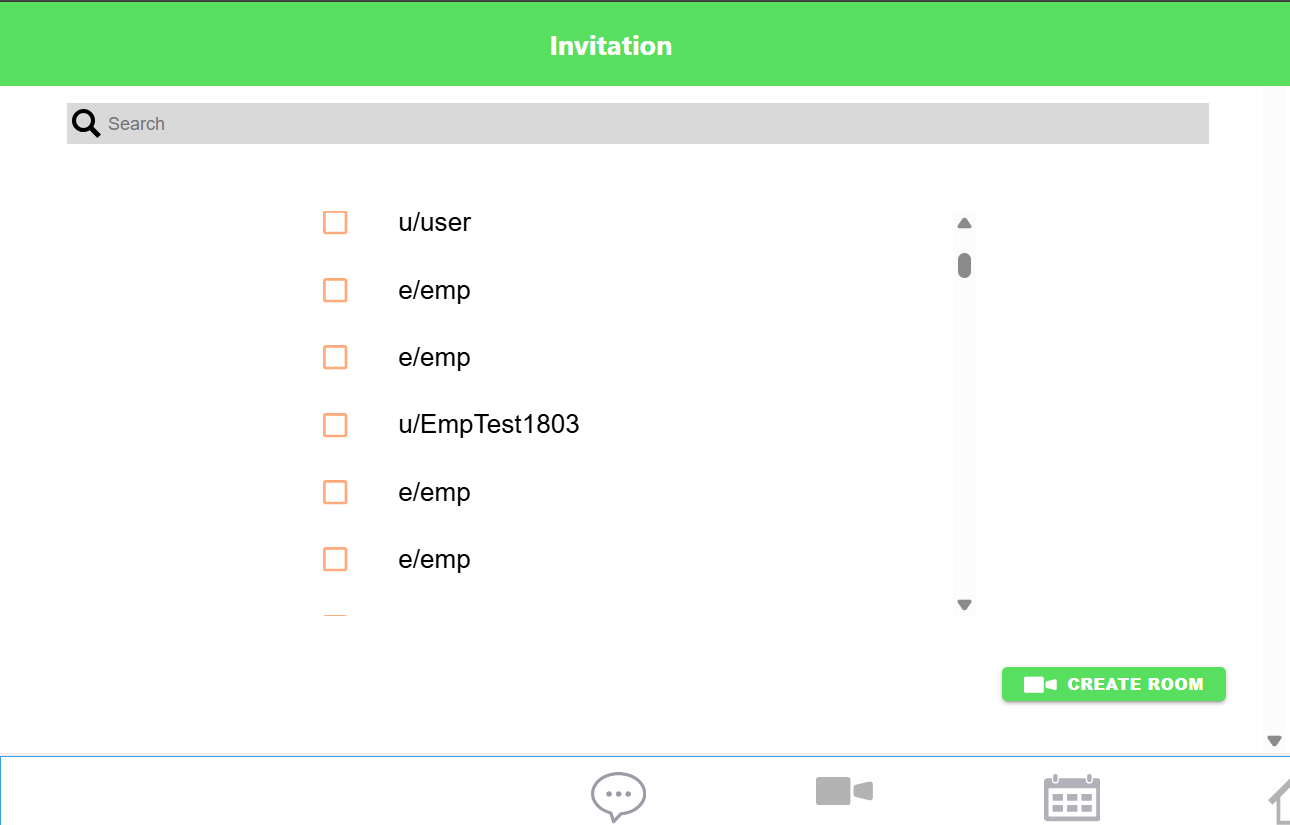
You will see a menu to select the users you want to invite into a meeting, and a search bar to find specific users.
Click on the users you want to invite and then click Create Room.
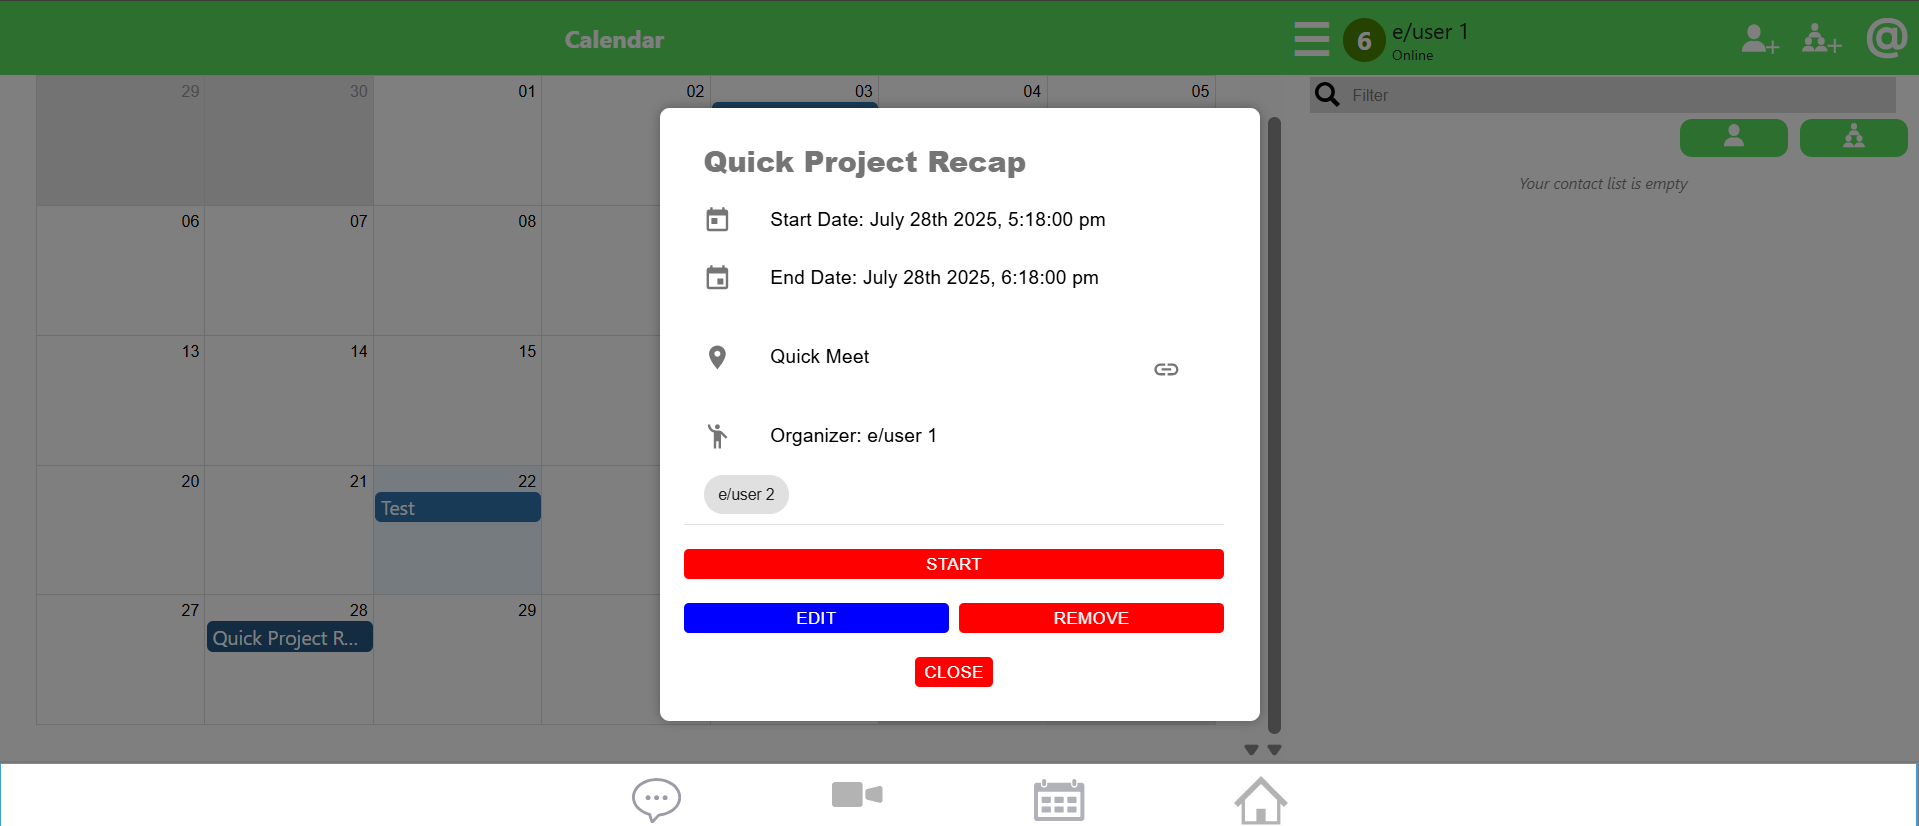
You will then be directed to a menu to name and schedule the meeting. A meeting name is mandatory to create generate the meeting link.
The meeting you’ve created will be reflected in your Calendar in the CareBiz navigation bar!
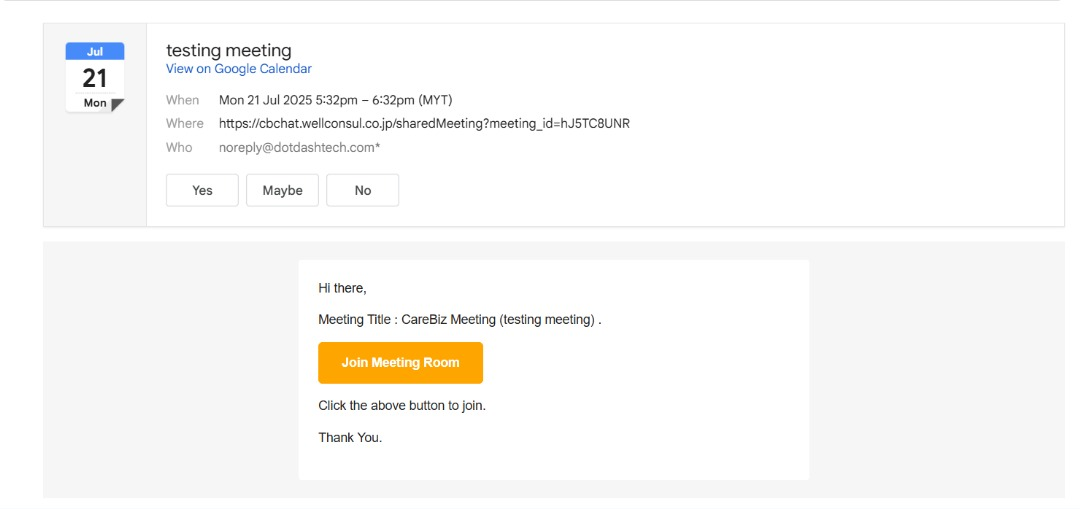
Additionally, the invitees will receive an email invitation notifying them about the meeting. They can simply join the meeting by clicking on the Join Meeting Room button or by copying and pasting the meeting link into a browser.
6.3.2. Edit Meeting
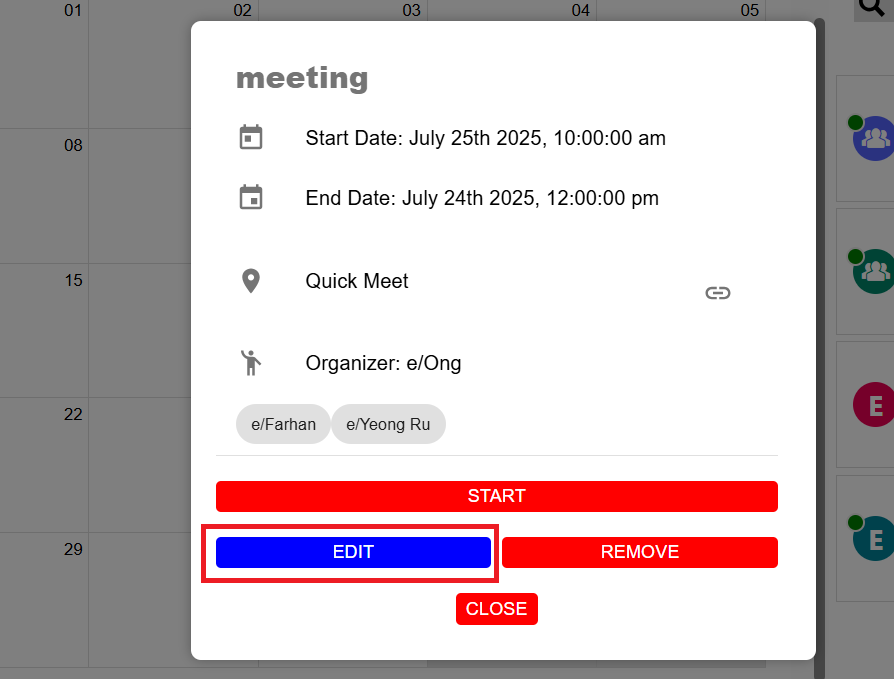
If you want to edit the meeting, you can do so by clicking on the Edit button.
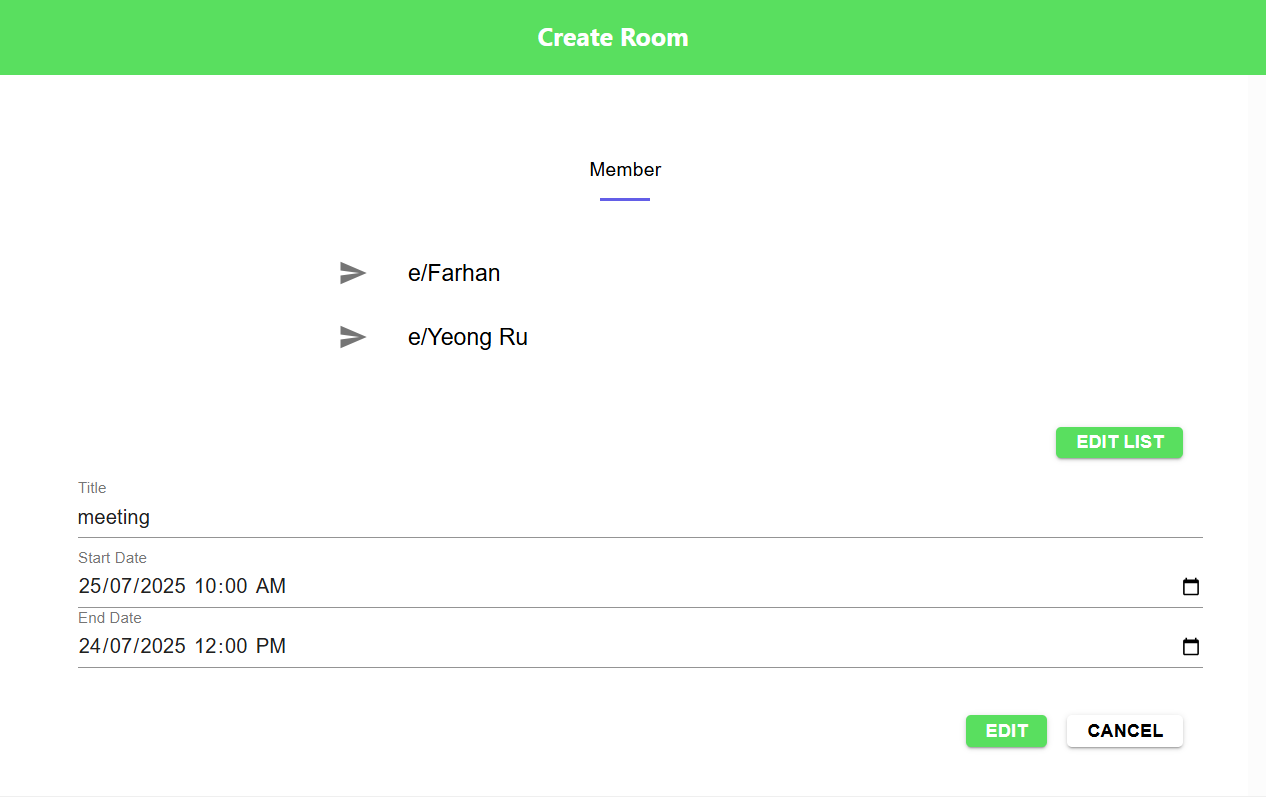
You can change the meeting name, date, time, and members. After making the changes, click on the Edit button to update the meeting details.
6.3.3. Remove Meeting
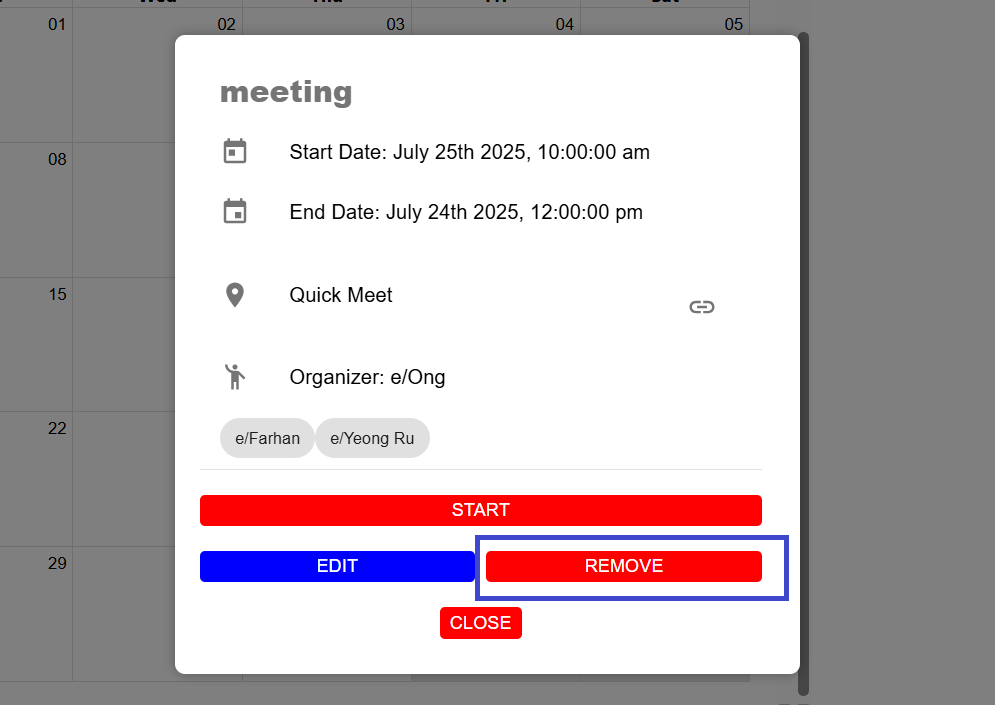
If you want to remove the meeting, you can do so by clicking on the Remove button.
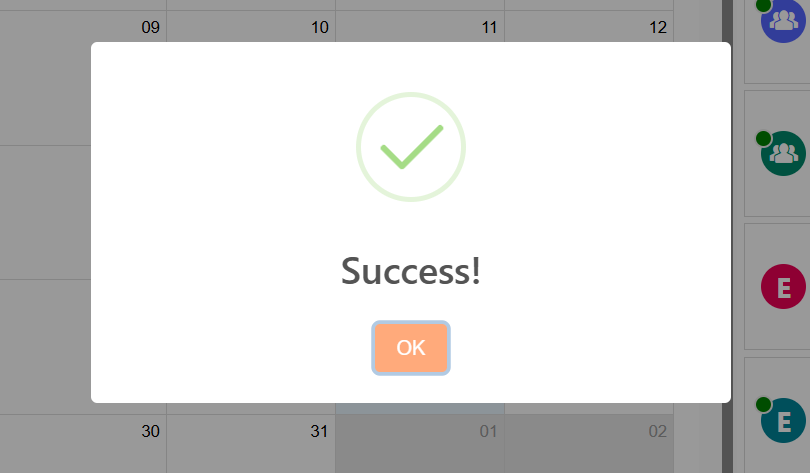
Success message will appear confirming the meeting has been removed.
6.3.4. The Meeting Room
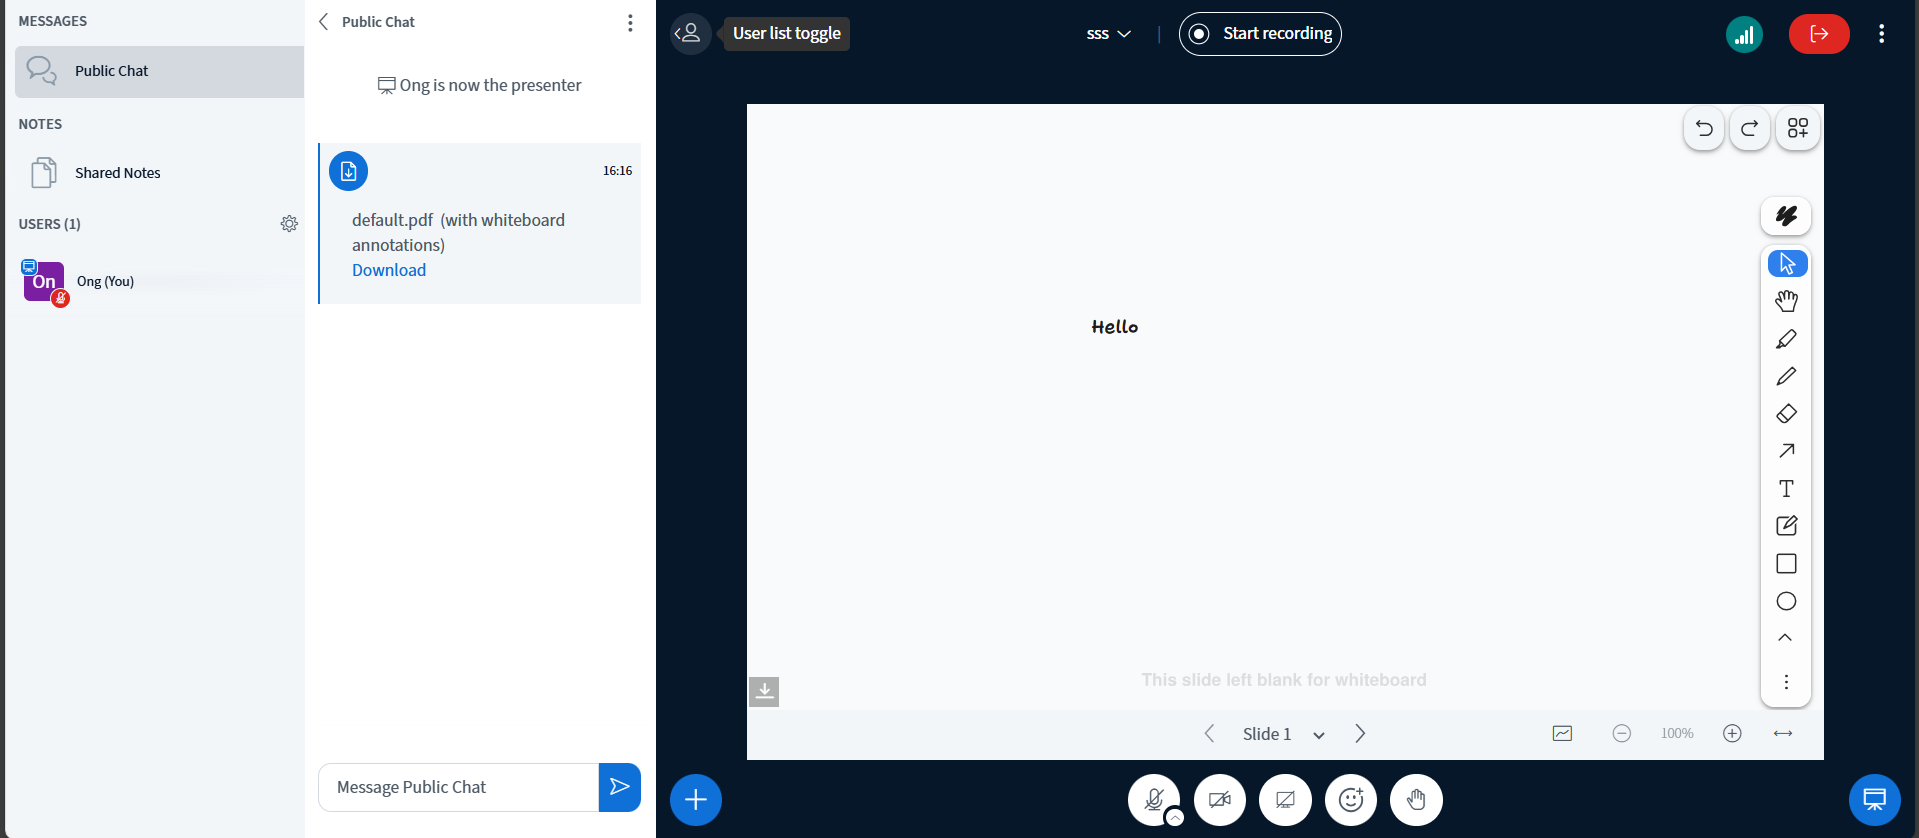
Once you’ve started your meeting, you should see the UI below.
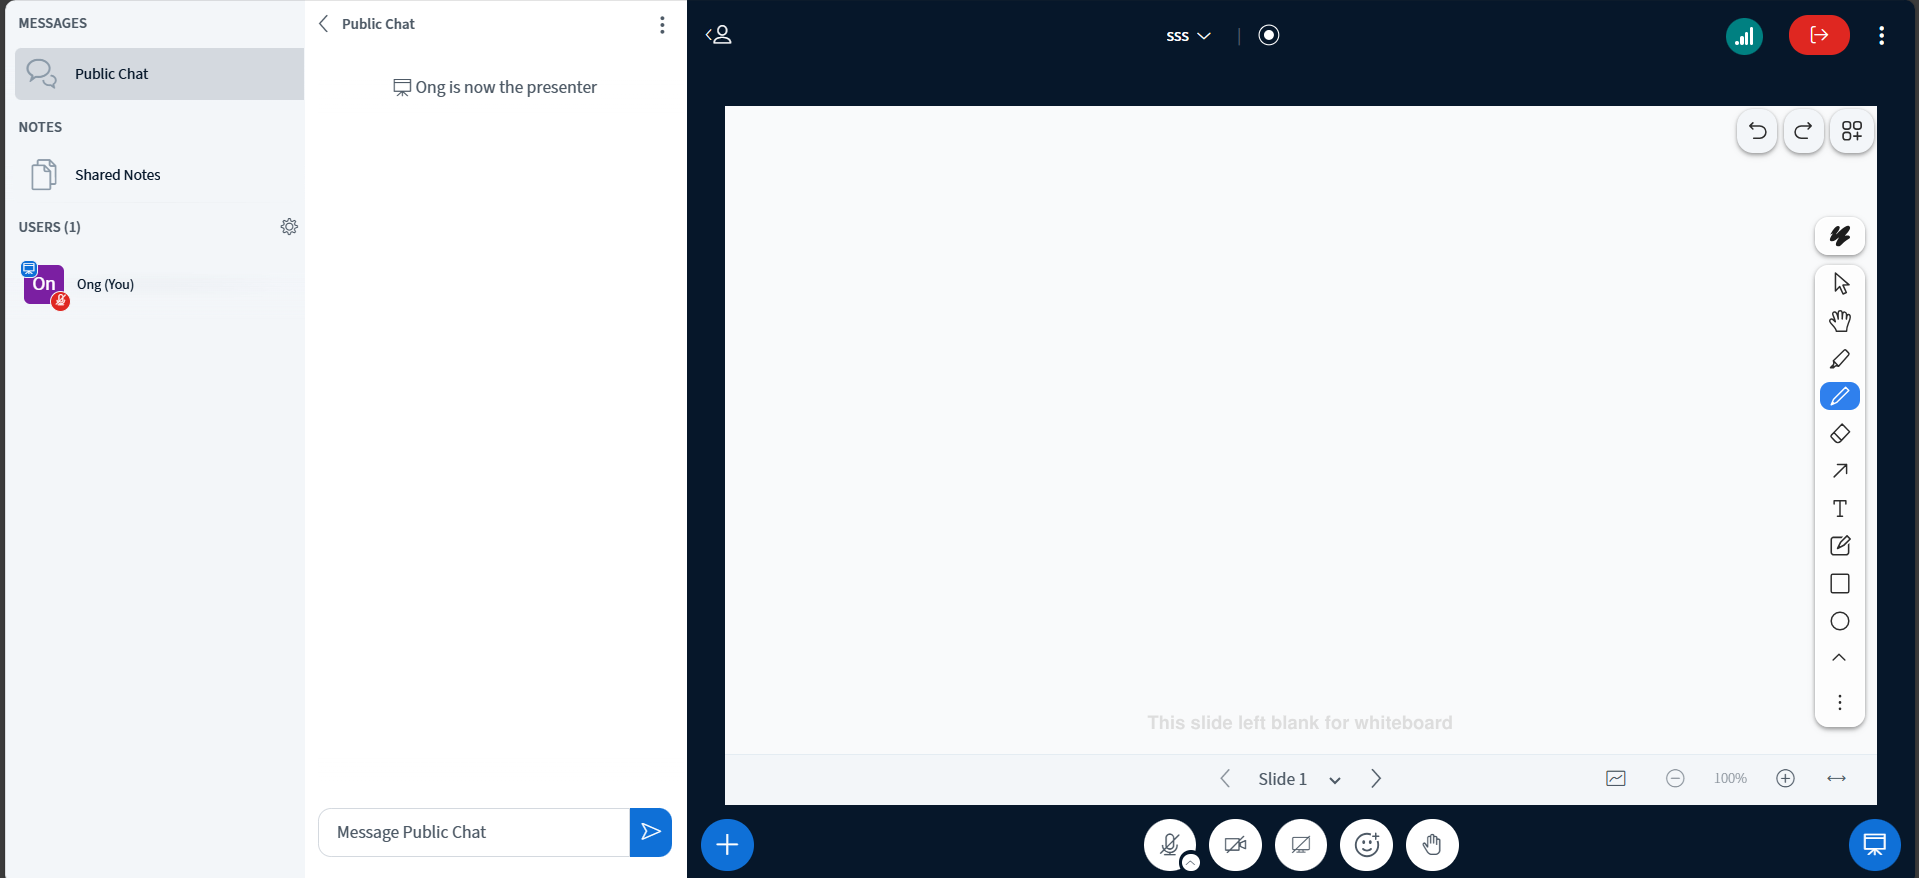
There are a lot of buttons and functions to familiarize yourself with here. But they’re all useful in their own way, so lets go through them one by one.
The Whiteboard
The large blank white space is where the presenter (and audience) can write, type, draw and erase whatever they need to visually communicate with the audience.

The presenter of the meeting can have the audience participate on the whiteboard whenever they want by clicking on the square icon in the navigation bar below the board.
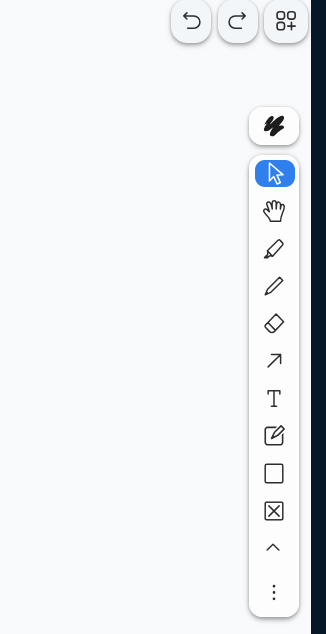
The buttons above on the other hand all change the styling of the user’s fonts, hand feature, highlighting, drawings, shapes, arrows, sticky notes, or text (by clicking on “T” button or double click on whiteboard) while using the whiteboard.
There have more shapes by clicking on the “^” button.
The eraser icon and the undo buttons can be used to reverse or erase any drawings, shapes or texts on the board.
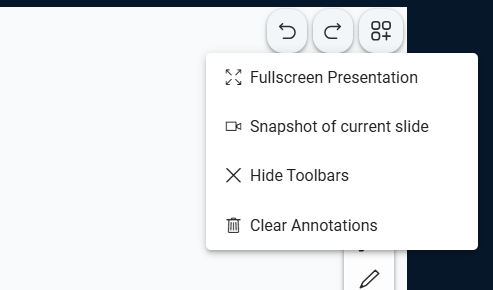
By clicking the Option button on the top right corner of the whiteboard, you can select to Fullscreen presentation, Snapshot of current slide, Hide Toolbars, and Clear Annotations.
Presenting Documents and Screen Sharing
Besides doodling on the whiteboard, you are also able to share (and doodle on) documents and power point slides.
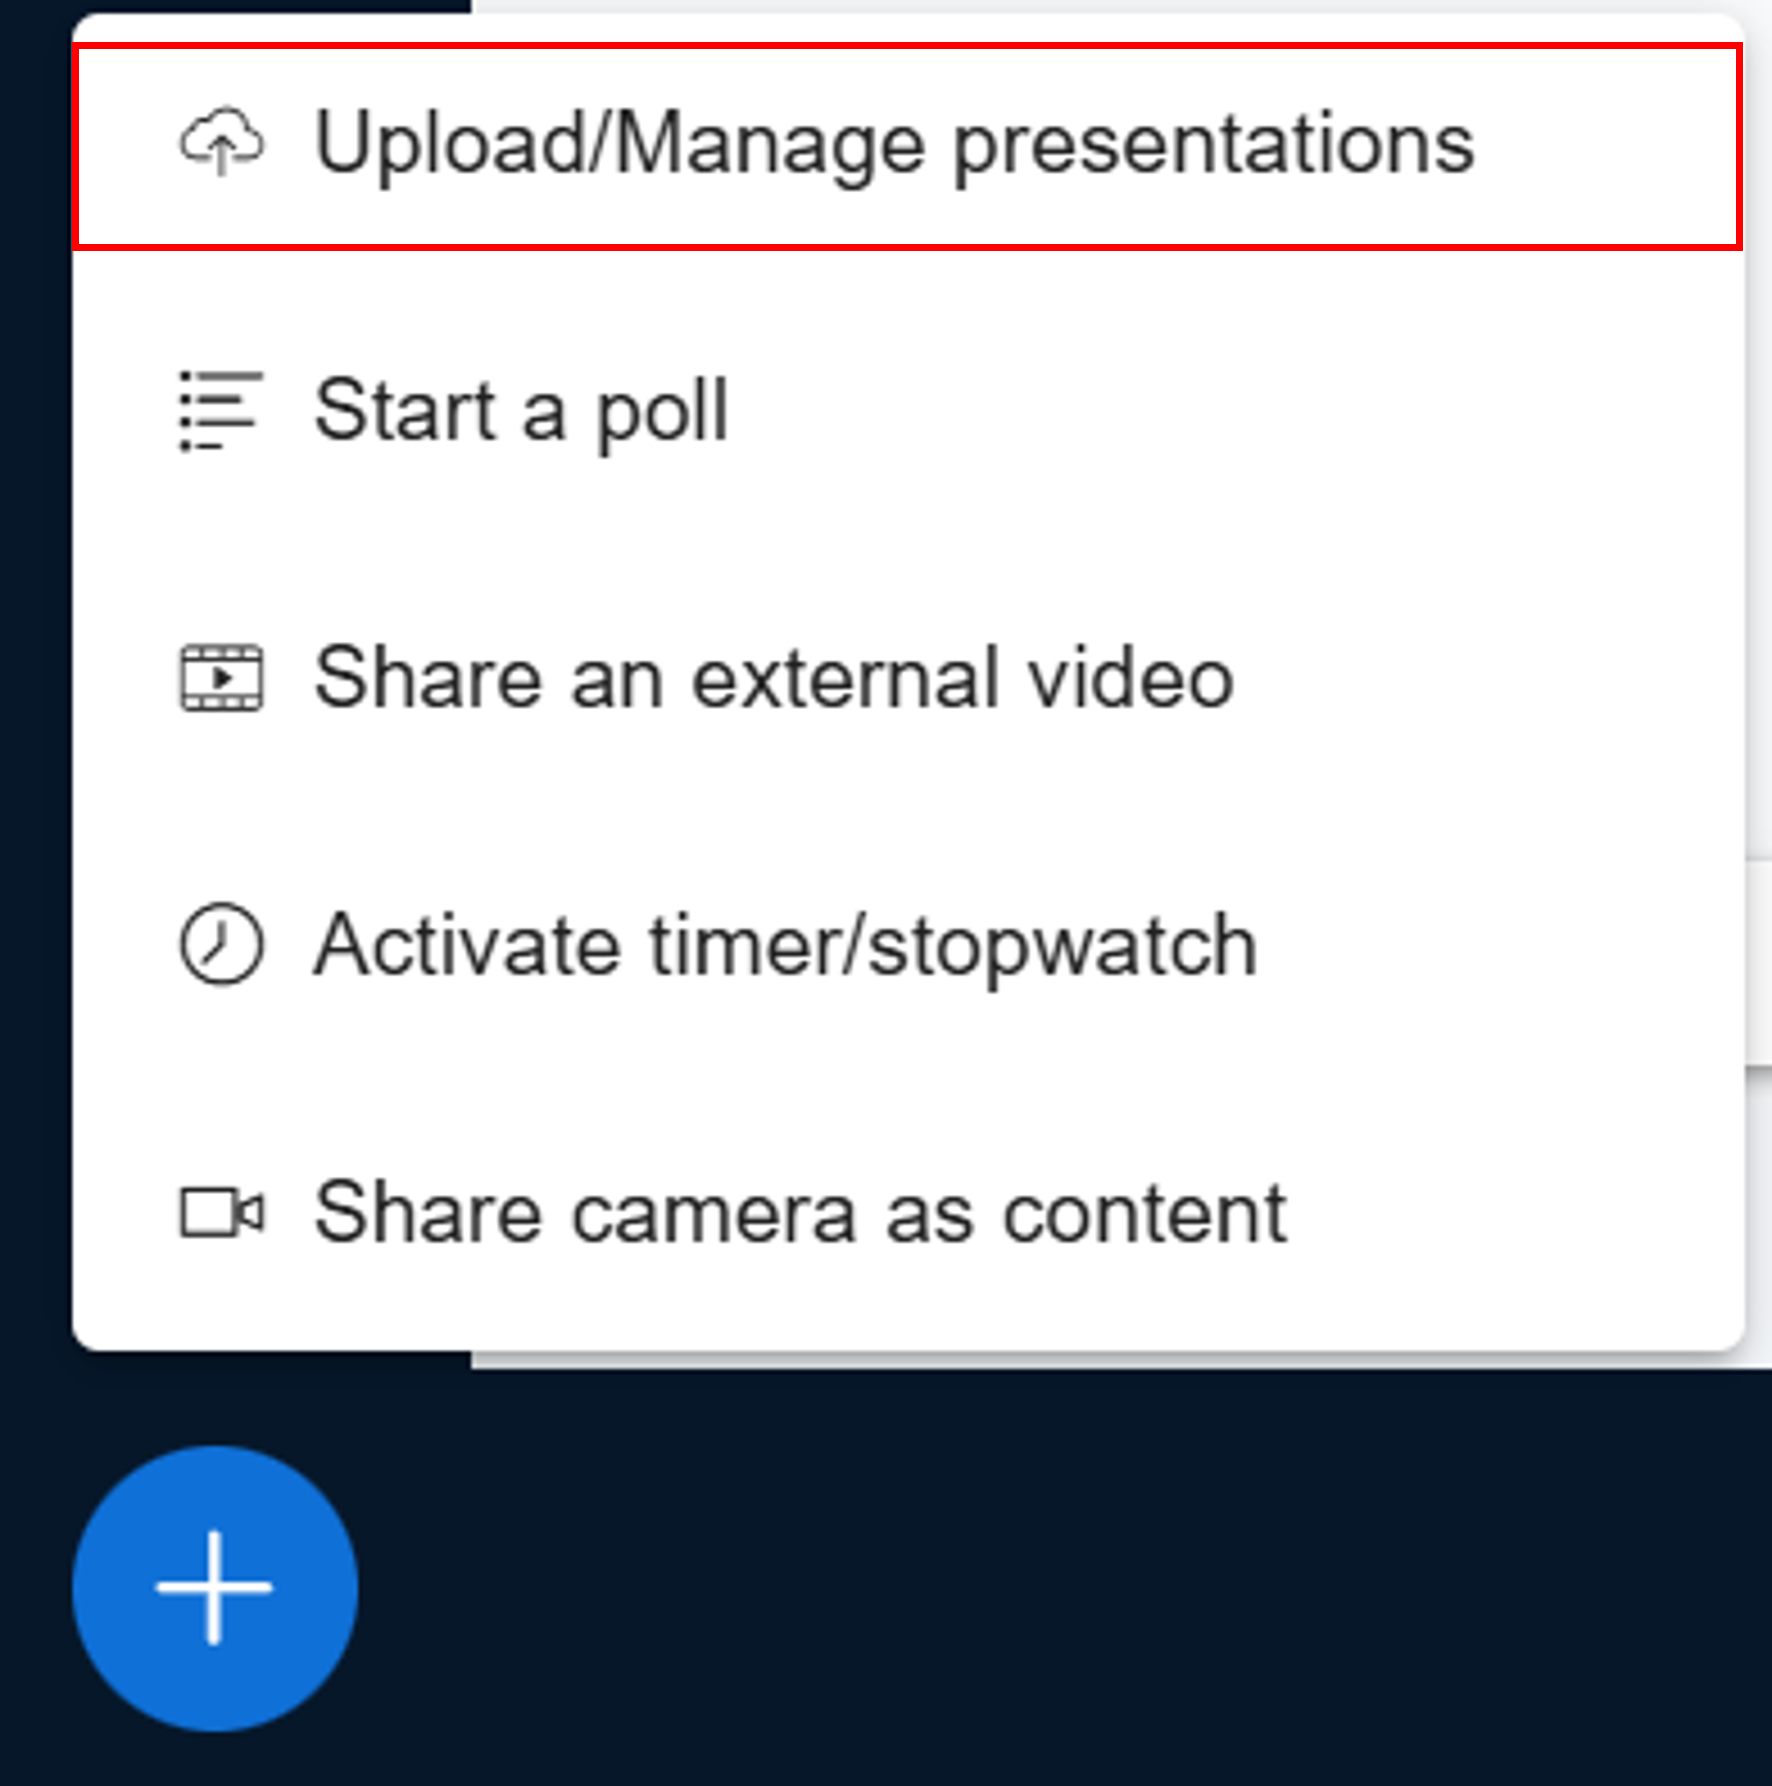
Click on the blue plus sign on the bottom left, and then click on Upload/Manage presentations.
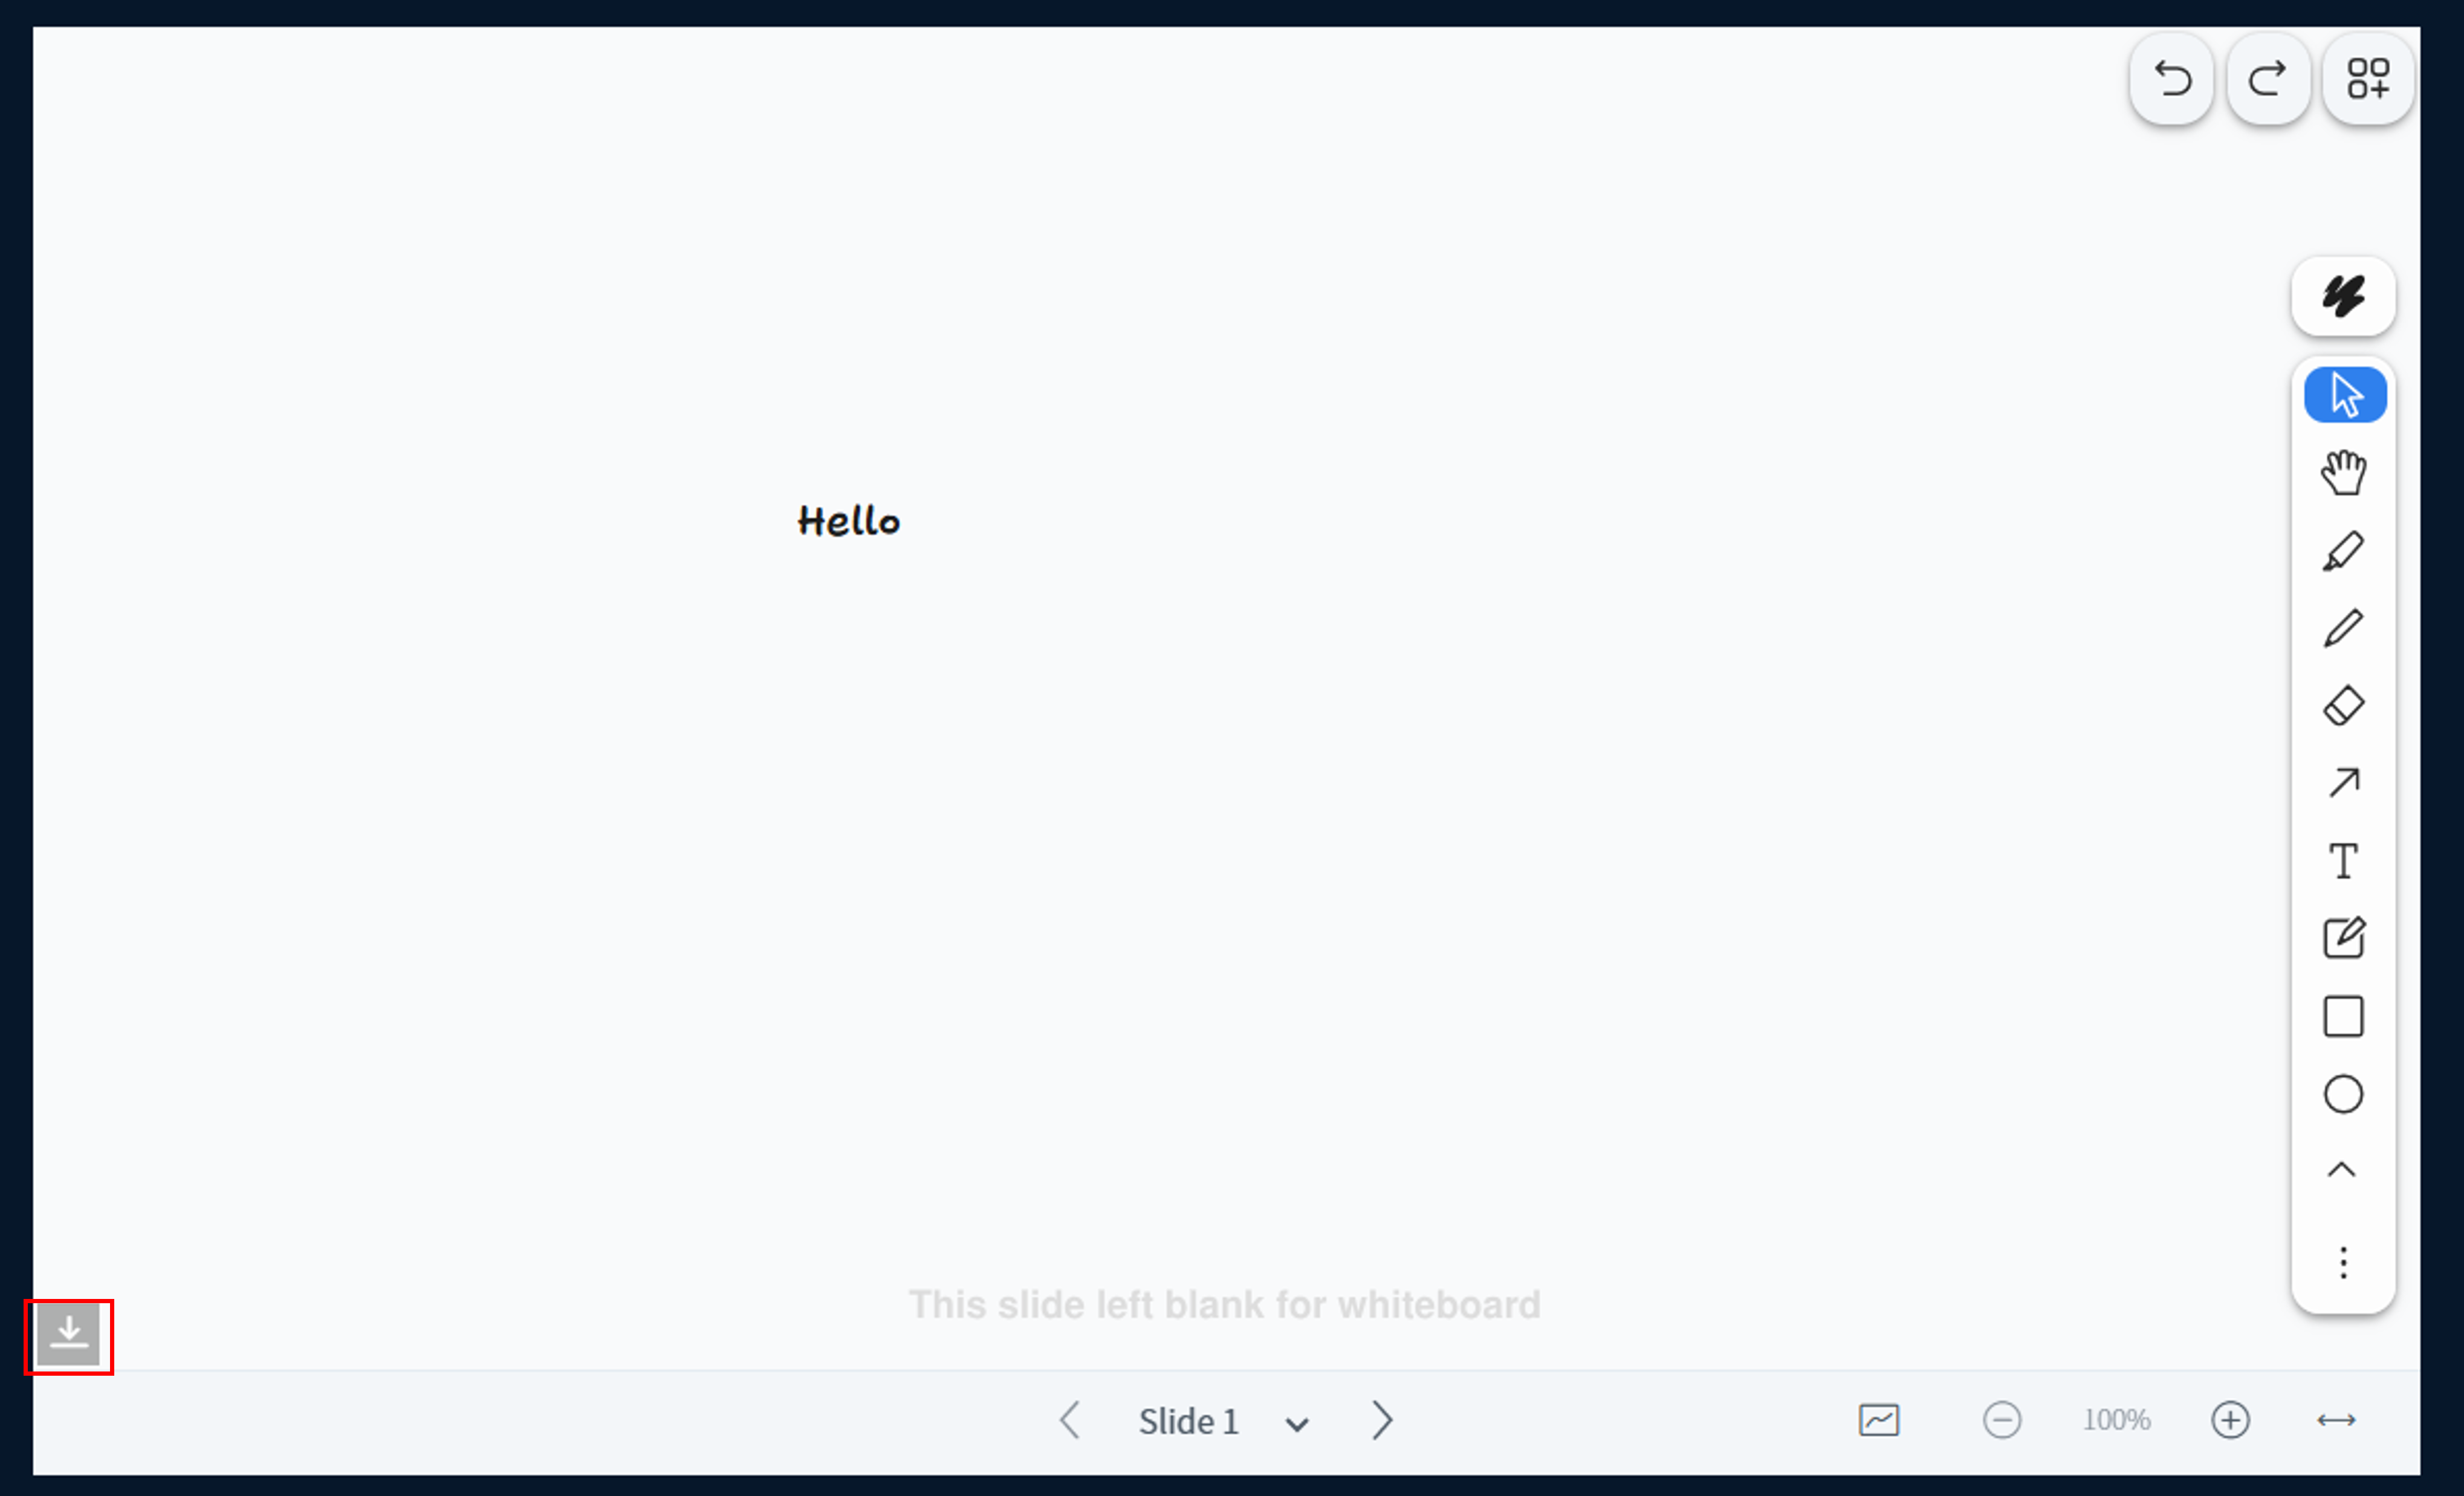
Afterwards, just drag and drop the file into the box in the page above, and click the Upload button on the top right.
By clicking the three vertical dots, there have 2 options to enable download:
Enable or disable download permissions for the uploaded files.
Send out download link to the chat room.
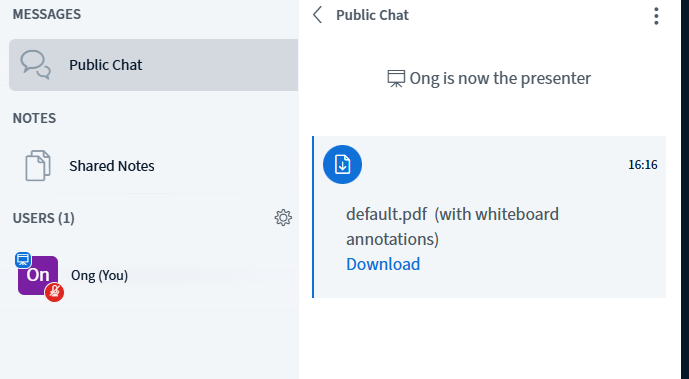
After enable download permissions, you can see the download button on the bottom left of the whiteboard or slide.
It will send a download link to the chat room when presenter click to send it, so that participants can download the file.
Other than the whiteboard, you can also interact with your participants in other ways. The Action button (the ‘+’ button on the bottom left) also lets you start polls and share videos.
The Share Your Screen button lets you share a window, tab, or an entire screen for a presentation.


Text Chat and Managing Participants

To access or close the User List, click on the user list toggle button on the top left of the meeting room’s UI.
The Public Chat button lets you access the text chat log of the meeting, as well as letting you save, copy or delete the text as you see fit. Certain activities such as Polls and Meeting Captions may also be access through here.

Also there has Share Note to let you write down notes during the meeting.
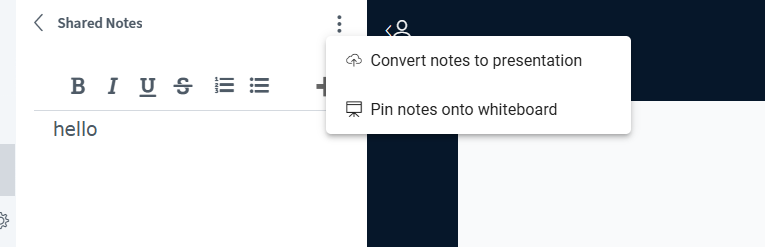
You can write down notes during the meeting, and share it with the participants by clicking on the Convert Notes to Presentation button. And also you can choose to pin the notes onto whiteboard.
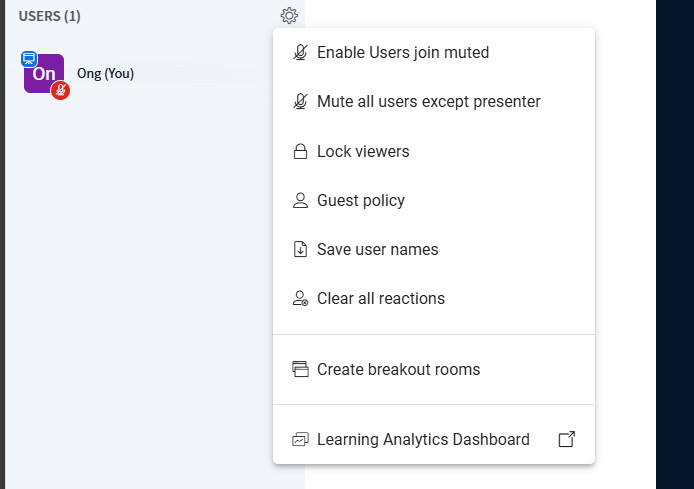
- Simply click on the Participants’ gear icon to access all the options to manage the meeting. Starting from the top, each option lets you:
Enable Users join muted, which mutes all participants when they join the meeting.
Mute all users except presenter, which mutes all participants except the presenter.
Lock viewers, a function that can restrict specific functions from being used by regular participants/audience member.
Guest policy, a function that changes default meeting guest policy for when meeting participants enter.
Save user names, saves all user names currently in the meeting call.
Clear all reactions, clears out all raised hands and other emoji reactions from participants in the call.
Create breakout rooms, to seperate the meeting participants into different meeting rooms for discussion.
Learning Analytics Dashboard, to open a dashboard that summarizes all user activity in the meeting room over the course the meeting has started.